
Laptop to Mini PC: The Home Server Hardware Upgrade
contents
When the laptop stopped being the right tool
The laptop that started this series was never meant to be a permanent server. It was what I had, and the whole point of Part 1 was “use what you already own.” That ethos served me well through sixteen parts and a lot of services: Jellyfin, Immich, Paperless, Navidrome, the whole stack ran on a repurposed laptop for months, and it ran fine.
But somewhere around Part 12 or 13, the gap between “it works” and “it’s the right tool” got hard to ignore. The laptop’s hardware transcoding was limited. Adding another service meant worrying about whether the CPU or RAM had room. The machine was never designed to run 24/7, and while it handled the load, I could feel the constraints every time I deployed something new.
I didn’t need more horsepower for the sake of it. What I needed was hardware that was built for what I was asking it to do: sit quietly in a corner, run a couple dozen containers, and disappear into the background. That is a different design brief than “old laptop running Debian,” and it deserved a proper hardware decision.
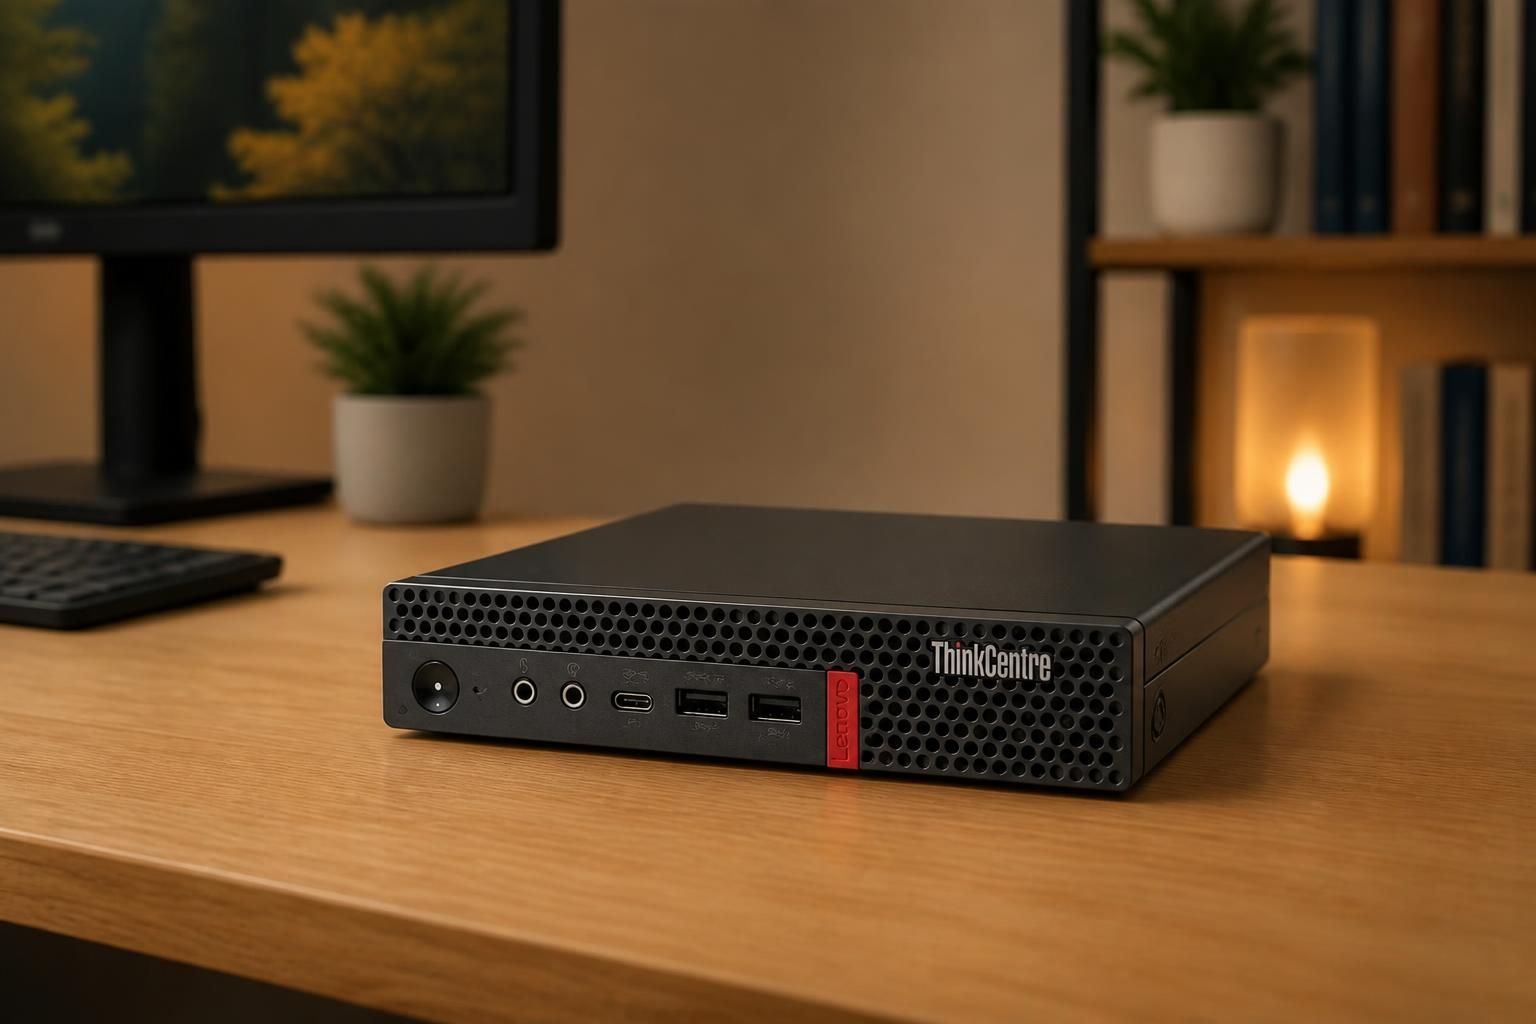
This post is that decision. It covers how I picked the replacement, why I landed on a Lenovo ThinkCentre M720q Tiny, the 32GB RAM question that took real research to answer, and the concrete changes that matter for anyone following the series from the laptop era.
What this post covers
- Why the laptop was outgrown without being outmatched.
- The three hardware paths I seriously considered and why only one won.
- How the 32GB RAM question got answered.
- What changed for the services covered in earlier parts.
Three candidates, one clear winner
I started with a short list. The requirements were modest: low idle power (this box runs 24/7), enough CPU for a half-dozen concurrent services, Quick Sync for media transcoding, and a form factor that fits on a shelf without looking like infrastructure. Under $250 all-in.
Three paths emerged from the research.
The leading contender: Lenovo ThinkCentre M720q Tiny
The M720q is a used enterprise Tiny desktop. It belongs to the class of mini PCs that offices bought in bulk and are now flooding the secondhand market at around $125–165. The specific configuration I targeted was the i5-8400T, which is a 6-core, 6-thread CPU with a 35W TDP — the “T” suffix means Intel engineered it for low power from the start.
What set the M720q apart from similar mini PCs from Dell and HP was one feature: a PCIe riser slot. Most Tiny/Micro/Ultra-Small form factor machines have no expansion at all. The M720q has a half-height PCIe slot that can take a SATA controller, a faster NIC, or other cards down the road. That future-proofing mattered more than I expected. It meant I could add storage without USB enclosures, and it kept the box from being a dead end if my needs grew.
Quick Sync Video on the UHD 630 iGPU makes the difference between a 4K transcode pinning all CPU cores and it happening with near-zero impact. And the whole machine idles somewhere around 6–10 watts once tuned — I measured the CPU package at 0.07W in deep C7 state, with 99.7% of time spent in idle. For a 24/7 server, that’s the number that matters.
Cost: ~$165 for the unit plus ~$40–77 for RAM, totaling around $205–240. Full specs and documentation are on Lenovo’s support page.
The “just works” fallback: Beelink ME Pro 2
Beelink’s ME Pro 2 is a modern N100/N150 mini PC sold new with a warranty. It’s quiet, idle-efficient, and comes with 16GB of RAM and a 1TB SSD built in. At around $369–399, it’s the “buy it, plug it in, done” option — no research, no used-market risk, no assembly.
I considered it seriously. The N100 is a capable little chip, and having a warranty on a machine that holds my data is genuinely appealing. What stopped me was the price gap and the expansion limit. The Beelink costs roughly double the M720q. It has multiple M.2 and SATA ports — but no PCIe slot. Once I outgrew the built-in storage, the path was USB or nothing. And the N100’s Quick Sync is a generation older than the M720q’s UHD 630. For Jellyfin transcoding, that difference matters.
The Beelink was the safe choice. The M720q was the better value with better headroom.
The DIY path: N100/N150 NAS motherboard kits
There’s a whole category of Chinese NAS-oriented motherboard kits — CWWK, Topton, and similar — that pair an N100 or N150 with multiple SATA ports and dual 2.5GbE. They’re popular in the homelab community because they promise a lot of IO in a small package for not much money.
I researched these extensively. The gamble I couldn’t accept was the power draw inconsistency. One owner reported their board stuck above 50W at idle because the BIOS didn’t expose the right C-state controls. Others had boards that idled at a reasonable 8–10W. But there was no way to know which experience I’d get before buying. Spotty quality control, spotty support — the savings felt like a lottery I didn’t want to play with an always-on machine.
Verdict: the M720q won. Used enterprise Tiny desktops are the 2026 consensus best path for a low-idle homelab, and the M720q’s rare PCIe expansion made it the best of that class.
The 32GB RAM decision
The RAM question occupied more of my research time than the CPU. Not because it’s complicated, but because the right answer depends on exactly which services you run, and that wasn’t fully settled when I was buying hardware.
The raw notes from my research actually disagreed with each other. One source said 16GB is enough for the core stack — Immich, Jellyfin, Paperless, Vaultwarden, Tailscale — as long as the LLM stays off this box. Another said 32GB is needed if you run Nextcloud alongside Immich and Paperless, because two Postgres instances plus MariaDB create real memory pressure. Both were correct for their specific assumptions. The problem was I hadn’t locked in my final service list yet.
I reconciled it by looking at where the ceiling was. The M720q maxes out at 32GB — two DDR4 SO-DIMM slots, no more. If I bought 16GB (2×8) and later needed more, I’d have to throw away both sticks and replace them. DDR4 is cheap by historical standards — I paid around $77 for a name-brand 16GB kit — but that’s still wasted money and e-waste if 16GB turns out to be the false economy.
I went with 32GB. The actual running stack — Immich, Paperless, Vaultwarden, Jellyfin, Navidrome, Audiobookshelf, Firefly III, Radicale, Home Assistant, Syncthing, and a handful of others alongside Postgres and Redis — uses about 11–14GB at rest depending on what’s been recently accessed. That leaves comfortable headroom for spikes during Immich ML scans or Jellyfin transcodes. 16GB would have worked, barely. 32GB means I never think about it.
One data point for anyone making the same call: if you run more than one Postgres-heavy service (Immich + Paperless + Nextcloud, for example), 16GB will be tight. If your stack is lighter — say, Vaultwarden + Jellyfin + a media downloader — 16GB is plenty. The honest answer is “it depends,” and the safe answer is “spend the extra $40.”
What this unblocks
Moving from laptop to M720q changed the server’s capabilities in a few concrete ways that matter for the services this series covers.
Hardware transcoding that actually works. The old laptop’s iGPU was limited, and I never fully trusted the QSV setup. On the M720q, the UHD 630 handles Jellyfin transcoding and Immich video encoding with near-zero CPU impact. The caveat worth knowing: the render group GID on Debian 13 is 992, not the 104 that older guides assume, and if you get it wrong, the container silently falls back to software without telling you. I confirmed it was working with intel_gpu_top — seeing the Video engine active while the CPU barely budged was the moment it felt real.
Room to run more services. The laptop could handle maybe eight containers before I started watching the resource graphs. The M720q runs about 25 with room to spare. The difference isn’t just “it’s faster” — it’s that I stopped thinking about whether a new service would fit and started thinking about whether it earned a place.
A storage split that matches how data actually behaves. The M720q has an NVMe boot drive and an internal 2.5" SATA bay. I landed on a layout where /srv/appdata and irreplaceable data (Immich library, Vaultwarden, Paperless documents) live on the NVMe, while bulk media and downloads sit on a 1TB HDD. The HDD has 38,000 hours on it — healthy but old — so putting it under /srv/storage/media instead of at the top of the tree means I can lose it without losing configs or databases. No compose files needed changing because services already pointed at /srv/storage/media/....
What changed for existing services
Most laptop-era posts still hold as standalone guides. Most of the setup steps — Docker conventions, directory layout, Tailscale, the actual docker compose up -d commands — are identical on the M720q. But a few things shifted in ways worth noting if you’re following the series from the beginning.
Networking (Parts 10 and 15)
Part 10 covered Pi-hole and Caddy for clean local URLs and HTTPS. That setup still runs, but Pi-hole moved off the server to a separate Raspberry Pi, and Tailscale became the primary access layer rather than a supplement. Part 15 compared Tailscale, WireGuard, and Cloudflare Tunnel — I landed on Tailscale as the single remote-access method, with zero open ports. The Pi-hole handles DNS for the LAN, and everything else reaches the server over the tailnet. It’s a simpler security model than what Part 10 described: one control plane instead of two.
Storage layout (Parts 5 and 11)
The /srv/appdata + /srv/storage split that Part 11 wished I’d done from day one is now the standard. Each service gets its own folder under /srv/appdata with compose.yaml, .env, and bind-mounted config — one folder, fully self-describing, back up the folder and you’ve backed up the service. The one convention that changed: I use one compose file per service rather than grouped “stack” files. Independent restart and troubleshooting is worth the small ceremony.
Backups (Part 14)
Part 14 outlined a backup strategy but admitted it wasn’t fully implemented. On the M720q, it’s built: restic 0.18.0 snaps nightly to a local HDD repo and weekly to Backblaze B2, with per-service database dumps before every run (Immich and Paperless use pg_dump, Vaultwarden uses sqlite3 .backup), a retention policy of 7 daily + 4 weekly + 6 monthly snapshots, and a systemd timer that fires at 3 AM. I tested a restore from B2 — byte-identical file, clean Vaultwarden integrity check — so the “test a restore” rule from Part 14 is now a checked box, not a deferred intention.
Media permissions (Part 3 and the *arr stack)
Part 3 set up Jellyfin with simple read-only media mounts. On the M720q, I added the full *arr pipeline — Prowlarr, Sonarr, Radarr, Bazarr, SABnzbd — which created a permissions problem: the *arr containers needed to write media, and Jellyfin needed to read it. The solution was a shared media group (GID 3000) with setgid on all library directories so new files inherit the group automatically. Containers that write use group_add: ["3000"]; Jellyfin mounts read-only. The details are specific to my setup, but the principle — one group, setgid on directories, UMask=002 on writing containers — is portable.
Firefly III, Radicale, and the subscription-killers
Part 6 covered Paperless for documents, but the financial side was absent. Firefly III now runs as a four-container stack (app, MariaDB, cron sidecar, importer) bound to 127.0.0.1 and fronted by Tailscale Serve — financial data, tailnet-only, with DB-aware backups wired into the same restic job. Radicale replaced the heavier Nextcloud for calendar and contacts: it stores plain .ics and .vcf files under /srv/appdata/radicale/data, takes a handful of megabytes, and requires no database at all. Both are covered by the same backup rotation as everything else.
What stayed the same
For all the changes, the server’s character hasn’t moved. It’s still Debian + Docker Compose. It’s still LAN-first, with remote access carved out selectively. It’s still built in small, reversible steps where each service earns its place rather than getting installed because it looked interesting on a Saturday. The hardware made the server more capable, but the philosophy that started in Part 1 is the same. The laptop proved the concept. The M720q lets it grow.
What’s next for the series
With the new hardware in place, the series picks up where Part 16 left off. The immediate next posts will cover the services that the laptop-era build didn’t reach:
- Firefly III — self-hosted finance, tailnet-only, DB-aware backups, and the gotchas around
APP_KEYlength and US-bank import limits. - Vaultwarden migration — leaving Apple Passwords behind, the CSV export, and the TOTP gotcha nobody mentions during migration guides.
- Radicale — clean CalDAV/CardDAV without the Nextcloud tax, fronted by Tailscale Serve.
- Frigate NVR — reusing an existing Night Owl DVR and a flashed Yi camera as local RTSP sources.
- And whatever else earns its way onto the server after that.
For the full map of where everything fits, the series index collects every part in order. The laptop era was sixteen parts. The mini PC era is just getting started.